Tired of the same old party formula? Do you want to glamorize your long planned party for those picture perfect Instagram shots?
Then you are in the right place! Here, we will show you how to make a photo booth for a party!
Our guide will help you create the ultimate photo booth experience—just like the ones we craft at GC Events!
But first, something about GC Events!
Learn how to make a Photo Booth from Professionals
GC Event has been creating exceptional photo booth experiences for over a decade. From corporate soirees to birthday parties, from graduation bashes to Christmas celebrations, we have done it all.
With this extensive experience, we have mastered what works in setting up a great photo booth and what to avoid to ensure everything runs smoothly and looks fantastic.
Here, we will cover everything on how to do a photo booth at a party–the tips, our tricks–and how to make a professional photo booth for your party, even if you have never done it before.
After all, we are the photo booth experts.

How to make a photo booth for a party?
To create the perfect photo booth for your party, first you need to gather some supplies. Here, have put together a list of essentials that you need to get for our recommended party photo booth.
- A Camera
- Tripod
- Good Lighting
- A Backdrop
- Props
- A Photo Booth Frame (Optional)

#1: A Camera
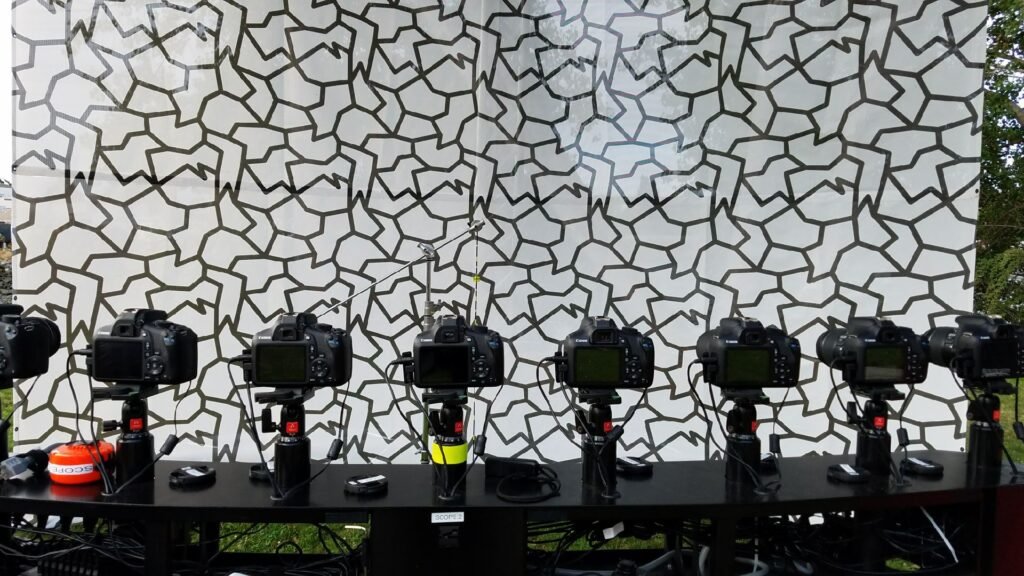
A camera is an obvious choice for a photo booth. While you can always use your phone in place of an SLR, we would not recommend it.
Instead, if you don’t want to go through the hassle of setting up a camera, getting an iPad will work better for you.
There are plenty of photo booth apps like Lumabooth, Fun2Booth, etc and they provide a far better photo booth experience on an iPad than on a phone. (This is why most people use an iPad for their photo booth setup. It’s all about the experience.)
Also, the big screen of an iPad is easier to use. We recommend getting a 12.9 inch iPad Pro for better details or a 13 inch iPad Air if you are looking for cheaper options. Also, you can always check the secondhand market for savings.
Pro tip: Most of the iPad apps for photo booths work better with newer iPads.
But what about a camera?
If you have more of a budget and want to splurge for even better details, a camera is the way to go. Canon EOS M50 has all the features you need for your first photo booth setup for a party.
(Scroll down to the photo booth setup with a camera section to figure out how to configure a camera for your party photo booth.)
#2: Tripod
A stable base is essential for your camera or iPad to avoid shaky images. You don’t want even a little sway, as it can ruin your perfect Instagram shots.
A good tripod keeps your device secure and at the perfect angle throughout the event.

For those on a budget, options like the Amazon Basics Tripod work best for a simple setup. If you are going with an iPad, don’t forget to add this iPad Mount adapter from Amazon in your cart. If you’re feeling crafty, DIY tripod solutions using household items can also work in a pinch.
But going with our recommended options will save you a lot of time and headache, in case anything goes wrong with your DIY option.
#3: A Backdrop
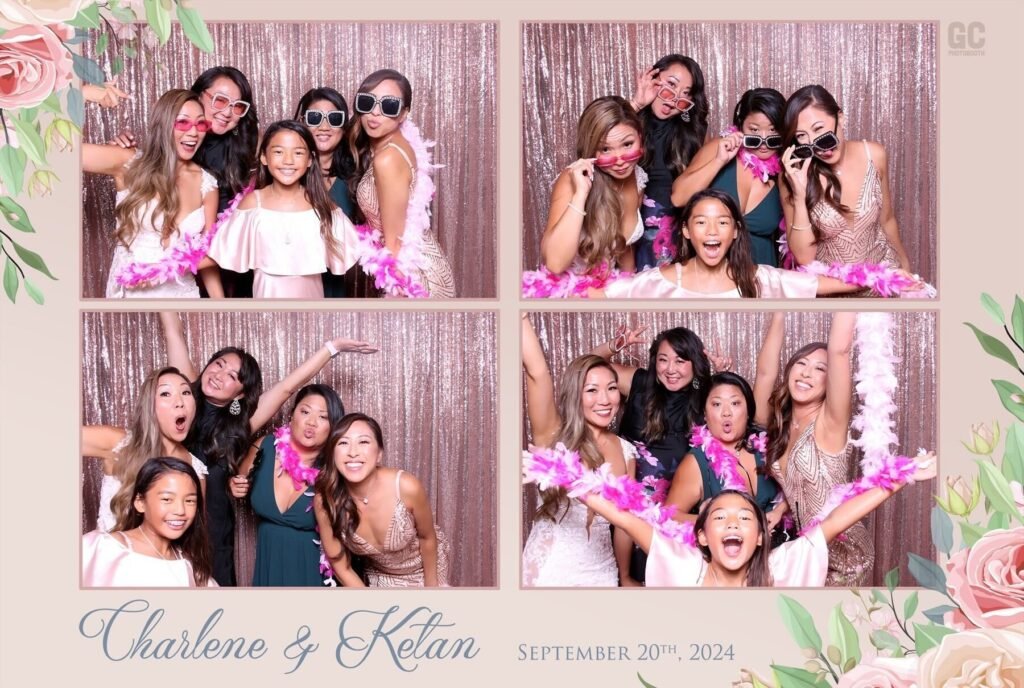
The backdrop is the heart of a photo booth setup—it sets the mood and creates ambiance, making the photos stand out. Here you can let your photo booth ideas run rampant.
Whether it’s a glamorous sequin curtain, a simple fabric, or a custom-designed theme, your backdrop will play a huge role in your booth’s success.
You can also always go for a simple gradient backdrop, or even add in some balloons for the extra flair, like in our examples below.


Or go for a themed backdrop to match your vibe.

No matter, if you choose to go for a pre-made backdrop or decide to make one at home, be sure to check out our collection of photo booth backdrops to get more photo booth ideas about the best photo booth backdrop for your party.
After picking up your backdrop, look around to see if you can find a pre-made backdrop on online stores, your local goodwill or Amazon. They have plenty of options to suit different themes and budgets.
But, if you can’t find the exact photo booth backdrop, even after going through our backdrop photo booth ideas, anywhere, you can always make one at home.
Backdrop Tips
If you’re crafting your diy photo booth backdrop at home, here are some tips to get you started.
- Use PVC Pipes to make a frame.
- Use streamers or curtains for a simple setup.
- Incorporate fairy lights for a magical touch.
- Choose a wrinkle resistant fabric like linen or polyester.
- Add in some balloons to create a dynamic background.
#4: A Good Lighting System

Lighting can make or break your photo booth experience, especially if you are going for an iPad setup for your party photo booth. And even if you aren’t using an iPad, good lighting goes a long way to pop out your pictures in the right places.
But you cannot just use any lighting.
The lighting needs to be perfect, not too harsh, as they can make your pictures too bright, and not too soft, as you don’t want everyone to look like zombies.
To get the perfect lighting for your photo booth, we recommend a softbox setup.
The softbox setup:
A simple softbox setup will work great for even lighting.
The Torjim Softbox Kit has everything you need for a softbox setup, and to add, you can easily adjust the intensity, the tones of the lighting with it.
#5: Props
Props are often overlooked, but they’re vital to a fun photo booth experience. From droopy hats to themed accessories, props add personality and entertainment.
For example, graduation-themed props might include caps and diplomas, while birthday parties could feature playful signs and silly glasses.
Or just go back to the 80s with our disco ball setup.

We highly recommend that you visit your local goodwill or roam around your local store to see if you can find anything interesting to incorporate in your party photo booth.
#6: A Photo Booth Frame (Optional)
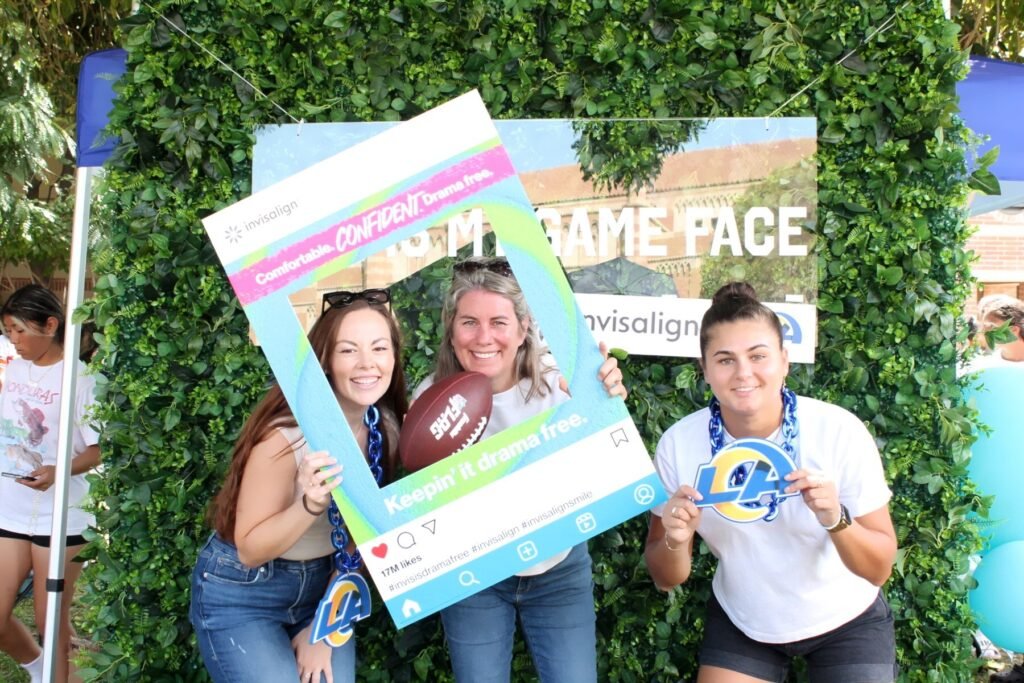
Just like props, although a photo booth frame is not essential, having one makes all the difference. Especially when maintaining the look of your theme is non-negotiable and you want everything to look perfect.
You can always get a pre-made locally, or if you just can’t find it in the right theme/color, there’s also the option to make one at home!
How to make a Photo Booth Frame for a Party?
Making a diy photo booth frame for a party is fairly simple. You just need a foam board, a spray paint, a box cutter, some stickers to match your theme and the grit to put it all together.
Here’s our step-by-step guide to help you make your photo booth frame.
Everything you need to make a Photo Booth Frame for a Party:
- Foam Board: Get an A2 Size Foam Board.
- Cutters: Get a box cutter and a scissor. (Also a ruler if you aren’t confident in cutting straight lines)
- A2 Printed Art Paper: Print out your own theme for the photo booth frame. Browse through Shutterstock photo booth frame designs to get interesting ideas for your party.
- Glue: Get some craft glue.
- A Soft base: Get some cardboards to cut everything on.
Step 1: Size the A2 Foam Board
Cut a square on one side of the A2 Foam board, leaving 3-4 inch borders on 3 sides. You need to make sure that the cutout is large enough to accommodate 2 people to pose in.
Resize the rest of the Foam sheet or you can get a smaller size foam sheet that is easier for everyone to hold on to.
Use the scissors to neaten out the edges of the cutout for a clean finish.
Pro tip: You can also use sandpaper to smooth out the edges for an even cleaner finish and to make sure that the lines are as straight as possible.
Step 2: Cut the Printed Art Paper
Place the foam board on the art paper and trace the original cutout with the box cutter so everything lines up.
Step 3: Apply Glue on the Foam Board
Apply a thin layer of craft glue on the foam board. Make sure that the coating is even.
Step 4: Press down the Art Paper
After lining up everything, spread out the art paper on the foam board. Make sure that the art paper is correctly set on the foam board before pressing down on the corners and moving upward to set in the art paper on the foam board.
Place something heavy on top of the art paper after you are done with the application.
Pro tip: Use a card to get rid of any creases on the art paper. And you can also attach small handles or straps at the back for easier holding.
And there you have it, your very own DIY photo booth frame for your party.
Now that we have everything, we can proceed to our step-by-step guide to set up the party photo booth.
How to Make a Photo Booth for a Party with an iPad ?

As mentioned before, using an iPad for a photo booth setup is not only affordable but it’s also a user friendly option. It allows you to capture and share photos from your photo booth effortlessly, making it an excellent choice for a party photo booth.
Here’s how you can set up a photo booth using an iPad step by step:
Step 1: Choose Your iPad
Select an iPad model with a large screen and a decent camera for the best results.
Recommended Options:
- iPad Pro 12.9-inch: Offers a high-resolution display and superior camera quality.
- iPad Air (13-inch): A more affordable option with sufficient features for photo booths.
Step 2: Install Photo Booth Software
Photo booth apps provide the tools you need to capture, edit, and share your photos.
Here are some top recommendations:
- Lumabooth: It’s easy to use with customizable templates.
- Fun2Booth: Includes features like fun filters and frames.
- Photoboxx: Offers seamless photo sharing and printing options.
Download and explore the app’s features to choose the one that fits your needs.
Remember that these photo booth apps will cost you a subscription fee, but they offer some of the best photo booth features for a seamless experience.
Step 3: Set Up the Tripod
Use a sturdy tripod or a stand to hold the iPad securely. Whether you use our recommended options or go with something you like, make sure that the iPad is secure.
You don’t want the stand toppling down in the middle of the shoot.
Make a perimeter line around the photo booth, so you can avoid any such accidents.
Step 4: Configure the App
Once your iPad is in place, configure the app settings:
- Choose the desired resolution.
- Set up filters, frames, or special effects, if you want any.
- Enable social media sharing and email or text delivery for guests.
Test the setup to ensure everything works smoothly,
Step 5: Enhance with Lighting
Proper lighting elevates your photo booth setup. Using the LED softbox, we recommended, will make for an easy setup.
But if you went with something else, just follow the included instructions that came with your lighting setup and you are good to go.
Pro Tip: Adjust the lighting to reduce shadows and avoid overexposure.
Step 6: Add a Backdrop and Props
The backdrop is the most important part of your photo booth setup.
Whether you went with a pre-made option or made one at home, make sure that the backdrop is evenly lit with the lighting.
You don’t want any shadows or unnecessary dark spots on the backdrop. Even lighting is the key in this situation.
Pro tip: Move the softbox to make sure that none of the shadows are coming on the backdrop.
Now add in the props and the photo booth frame on a table beside the photo booth and you are ready!
Step 7: Test the Setup
Before the event begins, take test photos to ensure you have positioned the iPad correctly and optimized all settings. Make adjustments as needed to guarantee smooth operation during the event.
Benefits of an iPad Photo Booth
- Convenience: Lightweight and portable, an iPad can be set up anywhere.
- Cost-Effective: No need for expensive equipment; printing and sharing are digital.
- Interactive Features: Guests can use the touchscreen to explore filters, frames, and other fun effects.
- Social Media Sharing: Enable instant uploads to Instagram, Facebook, or your event’s page.
By following these steps, you’ll have a professional-quality photo booth ready to create unforgettable memories at your party.
For more advanced setups or troubleshooting, don’t hesitate to reach out to GC Event Studio!
How to make a Photo Booth for a Party with a Camera?
Setting up a camera for a photo booth is a bit more complicated than going with an iPad. For a camera setup, you can skip the first four steps of our iPad setup guide, while the rest of the guide remains the same.
You just need an extra adapter cable and a companion device to set up the camera with.
Here’s our step-by-step guide to how you can easily set up a camera for your party photo booth at home.
Step 1: Choose your Camera System
As we recommended before, Canon EOS M50 has all the options you need for your first party photo booth. And to add, Canon sells the M50 with the Canon EF-M 15-45mm lens, which is an excellent lens for portraits and for a photo booth.
Here, if you already have a camera or want to go with another camera system, you don’t have to worry about anything. The rest of the guide remains the same no matter which camera you have.
Pro tip: Make sure to get extra batteries with your camera, so that you can keep the booth running for longer.
Step 2: Setup your Camera Tripod
Set the camera on the Tripod and make sure that it is secure. Add in some weight around the feet of the tripod if you are outside, in a windy environment.
Step 3: Setup the photo booth app
We recommend using Lumabooth as it has the easiest setup process for a camera photo booth. So with that in mind, download Lumabooth on your iPad or its companion app for windows on your laptop by visiting the LumaSoft Support Center.
Step 4: Connect it to the camera
Use a compatible usb dongle to connect your iPad or the windows laptop to the camera.
For more information about compatible cables, click here.
Lumabooth will automatically detect the camera and adjust its settings for the perfect party photo booth experience.
Now you can follow the same steps in the photo booth setup with an iPad from Step 5. And you are done with the first photo booth setup with a camera.
Is it worth it to make your own Photo Booth? Or Hiring the professionals makes more sense?

It pretty much depends on your needs or budget and the size of the event whether you choose DIY or hire professionals for setting up a photo booth for your party.
DIY booths are primarily recommended when an event is rather smaller or if you have a limited budget. They can help you with the savings, but on the flip side, DIY booths require considerable time and effort to get the full photo booth experience.
Whereas hiring professionals such as GC Event Studio is easier, and they can make wonders happen with carefully designed sets, top-notch equipment, and good support throughout the event.
You can create a DIY photo booth for a small personal gathering, but if you’re going big, have a lot of guests, and want to add quality assurance and get the best possible experience for them—it pays off slightly better to hire professionals.
Luckily, GC Events Studio offers excellent packages to suit the size and expectations of your event-from setting up to guest interaction, everything is seamless.
If you are having a hard time deciding between hiring professionals or going the DIY photo booth route, just reach out to us and we will help you choose the most suitable option for your individual needs.

Conclusion:
To recap on how to make a photo booth for a Party, setting up a party photo booth requires a few essentials: a reliable camera or iPad, a sturdy tripod, a captivating backdrop, proper lighting, and some fun props.
Whether you’re using an iPad or a camera, the goal is to create a fun and memorable experience for your guests.
With over a decade of expertise, GC Events Studio is here to help. Reach out to us for more information or assistance in creating the perfect premium photo booth for your event!